User Interface testing (UI testing) is testing a product’s graphical user interface (GUI) to ensure it meets its specifications. UI testing aims to identify and fix any usability or functionality issues with the interface before releasing the software to users. The test simulates user interactions with the interface, such as clicking buttons, filling out forms, navigating through the application, and checking that the interface behaves correctly.
This post will introduce UI testing fundamentals and show how to write UI testing using the XCTest framework. Finally, I will provide a sample code for the actual case. So let’s start it.
Why is UI testing necessary?
Before releasing software, QA usually runs regression testing to ensure that changes, such as bug fixes, new features, or changes to existing features, have kept existing functionality intact. If all rely on manual testing, it is expensive and time-consuming. Therefore, we can use UI testing instead of the part of manual testing, which will provide the following benefits:
- Reduce the cost of manual testing
- Reproducibility and consistency compared to manual testing
- Faster than manual testing
Manual testing still plays a role in software testing that is good for finding visual bugs and UI/UX problems. That’s why I say replacing the part of manual testing rather than all. More discussion about manual testing and automated testing can refer Test Automation vs Manual Testing: Picking the Right Balance.
What’s different with Unit testing?
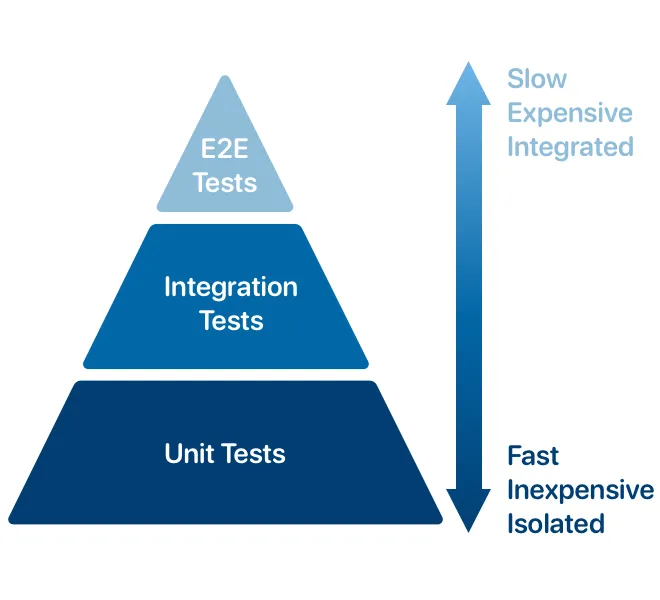
***Figure 1.*Test Pyramid
Try to answer this question with Test Pyramid. The Test Pyramid, introduced by Mike Cohn, is a concept that groups software testing into three groups (bottom to top):
- Unit tests focus on testing individual code units, such as functions, in isolation from the rest of the system. During a unit test, we must mock all external dependencies for verification.
- Integration tests focus on testing how different units of code work together.
- End-to-end tests(E2E tests) focus on testing the entire system, from the user interface to the backend. E2E testing includes various types of testing, and UI testing is one of them.
The top layers are more integrated, expensive, and slower than the bottom.
In summary, unit tests focus on testing small code units in isolation and frequently run during development. E2E tests (including UI testing) test the system’s overall functionality, simulate real user interactions, and run less frequently.
What are test cases and test suites?
A test case is a set of conditions under which a tester will determine whether an application under test works correctly. It typically contains the following information:
- Preconditions
- Description
- Test steps
- Test data (if needed)
- Expected result
A test suite is a collection of test cases used for a specific feature or functionality of the software. It can include multiple test cases to cover different scenarios and edge cases.
All right! It’s time to open Xcode and write UI tests.
Adding UI testing to your project
You can check the “Include Tests” option if you create a new project. Xcode will generate both UI testing and Unit testing.
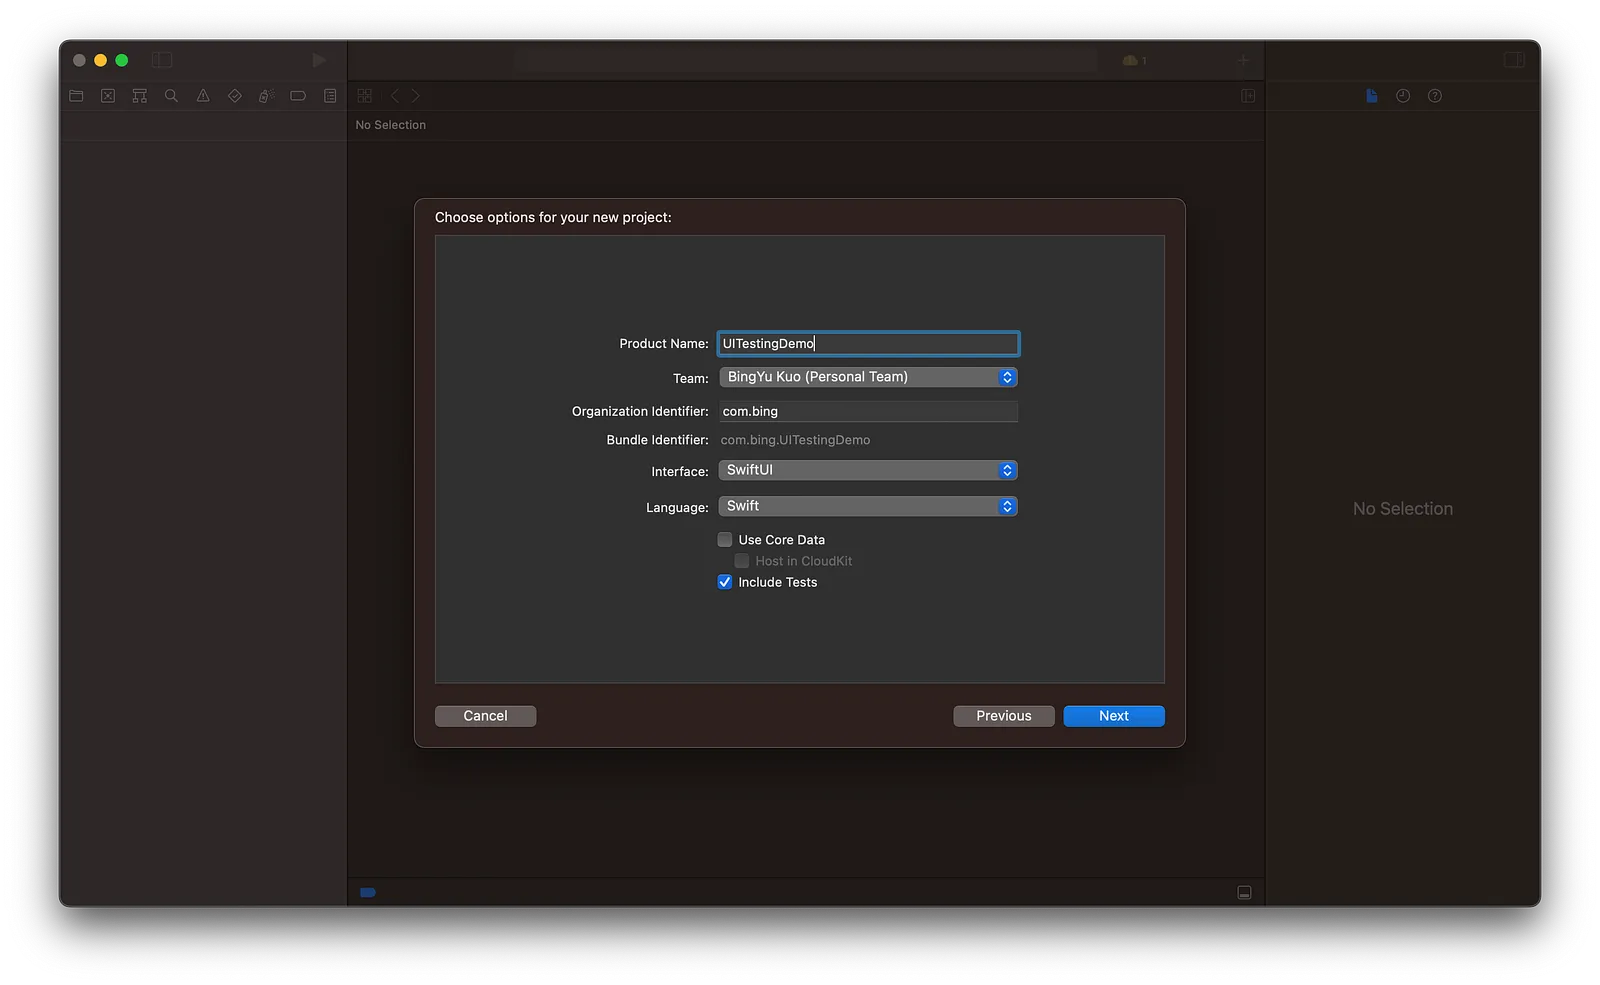
***Figure 2.*Adding tests in the building project.
If you already have a project, you can add it manually. Go to File > New > Target in the Xcode menu, search UI testing bundle, click next, then click finish.
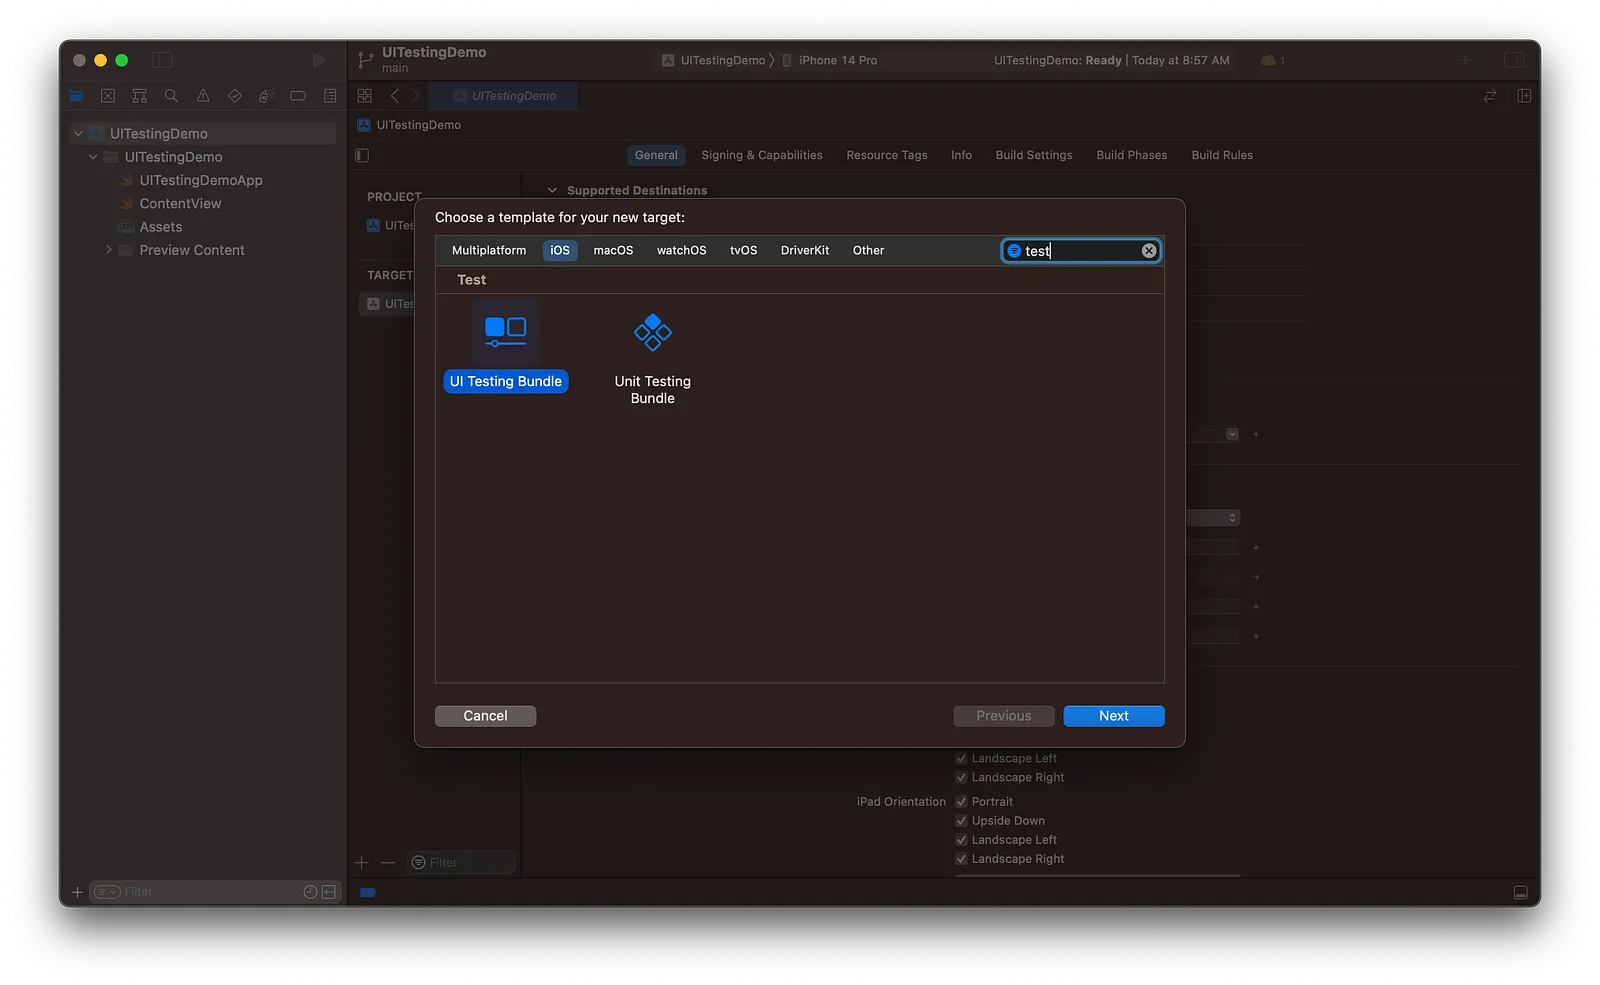
***Figure 3.*Adding UI testing target manually.
After creating a UI testing target, you will get two template files:
- UITests.swift is the entry point for UI testing, where you write most of your test code.
- UITestsLaunchTests.swift is a launch test sample that displays how to use XCTAttachment. By default, it runs multiple test cases (appearance, orientation, and localization) because runsForEachTargetApplicationUIConfiguration is true. You can see the log and screenshot attachment in the test report (Fig. 4).
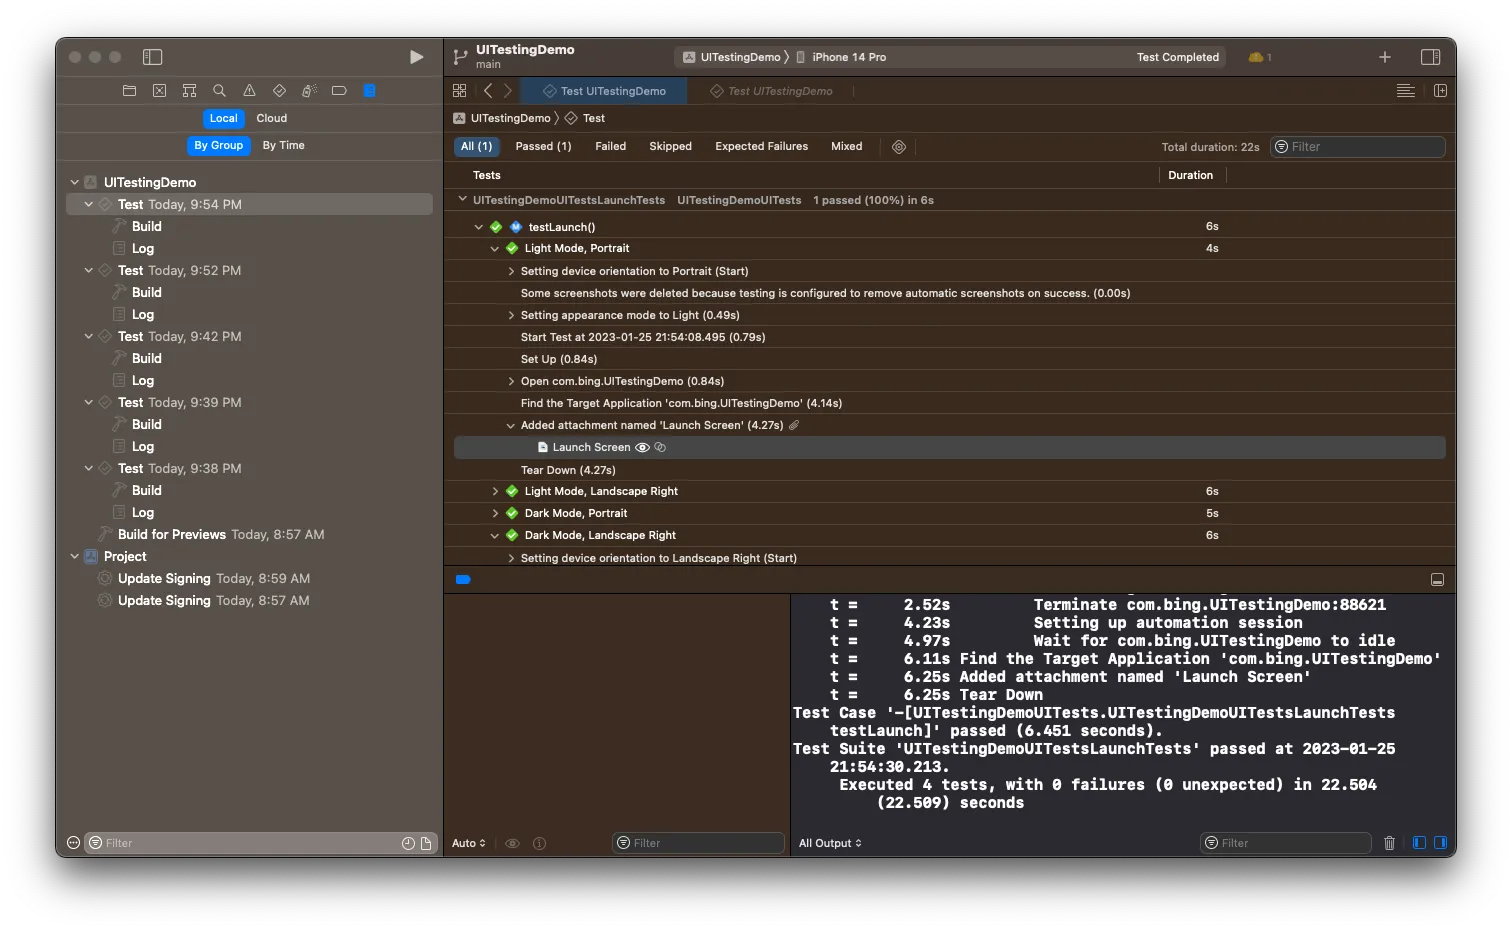
***Figure 4.*Logs and attachments in test reports.
Launch application
To get started, create an instance of XCUIApplication and call the launch().
let app = XCUIApplication()app.launch()XCUIApplication is a class XCTest framework that provides a way to interact with and control application under test (AUT).
The launch method is synchronous. The app is launched and ready to handle user events when it returns. If the app is already running, this call will terminate the existing instance and launch a new one.
Fetch UI element
After launching the app, you must find and interact with the UI element.
For example, if you want to fetch search fields, you can write:
let searchBar = app.searchFields["placeholder"]The searchFields is an XCUIElementQuery used to search for one or more elements in UI. Besides searchFields, Apple also provides other descendant elements, such as, buttons, tables, images, etc. See Querying Descendant Elements for more details.
Next, you need to get specific XCUIElement. Apple provides many APIs to find XCUIElement, and the following are the ones I commonly use. If you want more, please check here.
Subscript
Using subscript(_:), for example:
let button = app.buttons["button's label"]The string can be the element’s identifier, title, label, value, or placeholderValue.
You can assign a unique identification for the UI object by assigning a string to its accessibilityIdentifier.
Index
Use firstMatch or element(boundBy:), for example:
let firstButton = app.buttons.firstMatchlet secondButton = app.buttons.element(boundBy: 1) // Index starts from 0NSPredicate
Use NSPredicate when finding the element by more complex rules, for example:
// Suppose there are two buttons named "Button One" and "Button Two"let predicate = NSPredicate(format: "label like 'Button*'") // Find labels with the "Button" prefixlet button = app.buttons.element(matching: predicate).firstMatch // It may return many elementsYou need to provide the string that defines the rule. In the string, the “key” need to conform to the XCUIElementAttributes protocol, such as title, label, value, and so on.
Debugging information
If you can’t find the UI element you want, try to print the debugDescription, and you will get an element tree that shows the label, identifier, disable, etc., for each element.
print(app.debugDescription)Or set the breakpoint and print object (use po command) on the Xcode debugging console.
Interaction
After finding the UI element, you need to interact with it. You can do different actions for different UI elements. The following are the ones I commonly use if you want to know more, check here for details.
Typing
Typing text in TextField or SearchField, for example:
app.searchFields["Search username"].typeText("Apple")Click
Tapping the Button or Cell.
app.buttons["Search"].tap()Gestures
Swiping the ScrollView, TableView or Cell.
app.scrollViews.firstMatch.swipeUp()app.tables.firstMatch.swipeDown()app.tables.cells.firstMatch.swipeLeft()Verifying UI state
The most crucial thing is confirming whether the UI are as expected. In the following, I will provide some examples of scenarios.
Existence
When you need to verify whether the element exists:
XCTAssertTrue(app.buttons.firstMatch.exists)Wait expected state showing
Sometimes the UI shows up after a while. You need to wait expected state showing:
let result = app.buttons["Submit"].waitForExistence(timeout: 3)Or sleep a while:
sleep(3)Or using XCTNSPredicateExpectation:
enum UIStatus: String {    case exist = "exists == true"    case notExist = "exists == false"    case selected = "selected == true"    case notSelected = "selected == false"    case hittable = "isHittable == true"    case unhittable = "isHittable == false"}
class TestHelper {    static func expect(element: XCUIElement, status: UIStatus, withIn timeout: TimeInterval = 20) {        let expectation = XCTNSPredicateExpectation(predicate: NSPredicate(format: status.rawValue), object: element)        let result = XCTWaiter.wait(for: [expectation], timeout: timeout)
        if result == .timedOut {            XCTFail(expectation.description)        }    }}
This way also can use for other states of UI elements, such as selected and hittable (mean existed and clickable).
TestHelper.expect(element: button, status: .selected, withIn: 3)TestHelper.expect(element: button, status: .hittable, withIn: 3)Verifying data loaded
You can’t access the data model during UI testing, so you must check the cell count and existence to confirm that the data has been loaded on the tableView.
let cells = app.tables.cellsexpect(element: cells.firstMatch, status: .exist, withIn: 3)XCTAssertTrue(cells.count > 0)Verifying text
When the text of the Label or Button is dynamic, and you need to verify the text as expected:
let text = app.staticTexts["My Label"] // Find by identifierlet button = app.buttons["My Button"] // Find by identifier
XCTAssertTrue(text.label == "Hello Wolrd")XCTAssertTrue(button.label == "Hello Wolrd")
Verifying page navigation
When you need to verify that the page has been navigated, you can verify the page title whether exists:
app.navigationBars["Page Title"].existsFinally, I wrote a sample code about search authors in Github. My test case is when the user opens the APP, types “Apple” on the search bar, and sees the result on the screen.
import XCTest
final class GithubAPIUITests: XCTestCase {
    override func setUpWithError() throws {    }
    override func tearDownWithError() throws {    }
    /*     1. App launch     2. Tap the search bar     3. Typing "Apple" in the search bar     4. Tap the search button on the keyboard     5. Wait for the data loaded from the API     6. Verify the table view count is not empty     */    func testSearchUser() throws {        let app = XCUIApplication()        app.launch()
        let searchBar = app.searchFields["Search username"]        searchBar.tap()        searchBar.typeText("Apple")
        let searchButton = app.buttons["Search"]        searchButton.tap()
        let cells = app.tables.cells        TestHelper.expect(element: cells.firstMatch, status: .exist, withIn: 3)        XCTAssertTrue(cells.count > 0)    }}
The entire project I put on GitHub.
Were to go from here
Now you know how to write UI tests. Try writing it for your project; you’ll find it much more complicated. Some tips may help you:
- Print debugging information when you can’t find the element.
- Check the Apple document and choose the correct method.
One problem is reusability. Test cases increase over time, and the current architecture will contain many duplicated codes. We can import Page Object Model (POM) pattern to resolve this problem. I will write another post to introduce it.
When I wrote the sample code, I met another problem is Github API access limitation. So I find WireMock that a tool can mock API responses. It can also help to mock error HTTP status in failure scenarios. As the same, I will write another post to introduce it in the future.
That’s it. Thanks for reading.